
Introduction
Before you ever set foot on Liberty Island, you’ll move through several stages of the experience: ticket checks, airport-style security screening, ferry boarding procedures, and arrival protocols. None of it is particularly difficult, but if you don’t know what to expect, it can feel a little overwhelming—especially during busy travel periods.
I’ve watched travelers get caught off guard by unexpectedly long security lines, arrive without realizing they had timed reservations, or underestimate how much time the entire process actually takes. Small misunderstandings like these can add unnecessary stress to what should be one of the highlights of a New York trip.
Understanding the step-by-step entry process at the Statue of Liberty can help you avoid those common mistakes. From arriving at the departure terminal and clearing security to boarding the ferry and finally stepping onto Liberty Island, this guide walks you through the entire journey so you know exactly what to expect before your visit begins.
Quick Overview of the Statue of Liberty Entry Process
The first thing many visitors realize is that reaching the Statue of Liberty is a little journey with steps. You do not simply arrive at the waterfront and jump onto a ferry.
When I first watched the crowds moving through Battery Park, I noticed people checking tickets, joining security lines, and figuring out where to go next. It felt more like entering an airport than visiting a typical city attraction.
The good news is that everything follows a clear order. Once you understand the Statue of Liberty entry process step by step, the visit becomes much easier.
You arrive at the departure area, complete security screening, have your ticket checked, board the ferry, and then continue to Liberty Island.
Honestly, the visitors who seemed most relaxed were the ones who already knew what was coming. I’ve seen people standing in the wrong queue or wondering why they were not boarding immediately.
A few minutes of preparation beforehand can make the experience feel much smoother from start to finish.
How Many Security Checkpoints Should Visitors Expect?
Most visitors will pass through one main security checkpoint before boarding the ferry. Bags, personal belongings, and visitors themselves are screened before entering the departure area.
There can be an additional screening for guests with pedestal or crown access. This is where some of the Statue of Liberty entrance rules for visitors become more important, especially regarding what can be taken inside certain monument areas.
Typical Entry Timeline From Arrival to Liberty Island
On a normal day, I usually suggest allowing at least 45 to 90 minutes between arriving at the departure point and stepping onto Liberty Island.
Security lines and ferry queues can move quickly, but they can also slow down without much warning.
I’ve seen visitors arrive thinking they would be on a boat within minutes. Nope. During busy mornings, school groups and tour groups can add extra waiting time.
Arriving early gives you breathing room and makes the whole experience far more enjoyable.
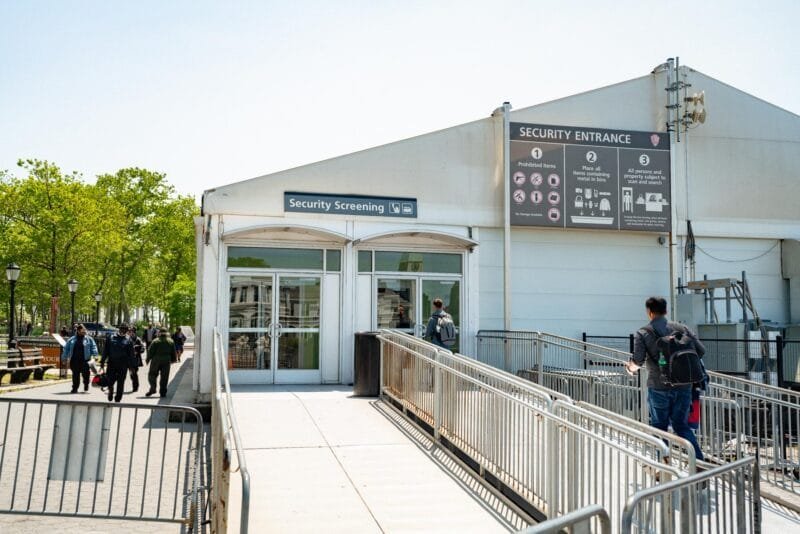
Step 1: Arrive at Your Departure Point
Your Statue of Liberty visit really begins at the departure terminal, not on the ferry. Depending on your ticket, you will start from Battery Park in Manhattan or Liberty State Park in New Jersey.
I still remember seeing visitors rush toward the waterfront only to realize they needed extra time to find the correct entrance area.
Before joining any line, take a quick look around and confirm where security screening begins. Think of this stage as the starting point of the Statue of Liberty check-in and boarding guide.
Getting your bearings early saves unnecessary walking and helps you stay relaxed before the next steps.
Entering the Security Queue at Battery Park or Liberty State Park
Once you reach the screening area, staff members direct visitors into organized queues. On busy mornings, lines can appear long, but they often move steadily.
I have noticed that people carrying fewer belongings usually move through the line with less hassle. Having your ticket ready also helps keep things moving smoothly.
Why Your Ticket Time Is Not Your Ferry Departure Time
This is one detail that catches many first-time visitors off guard. The time printed on your ticket relates to your reservation and arrival window, not necessarily the exact ferry departure.
I once overheard several travelers worrying they had missed their boat, when in reality they were exactly where they needed to be.
After security and ticket verification, you simply board the next available ferry assigned for visitors.

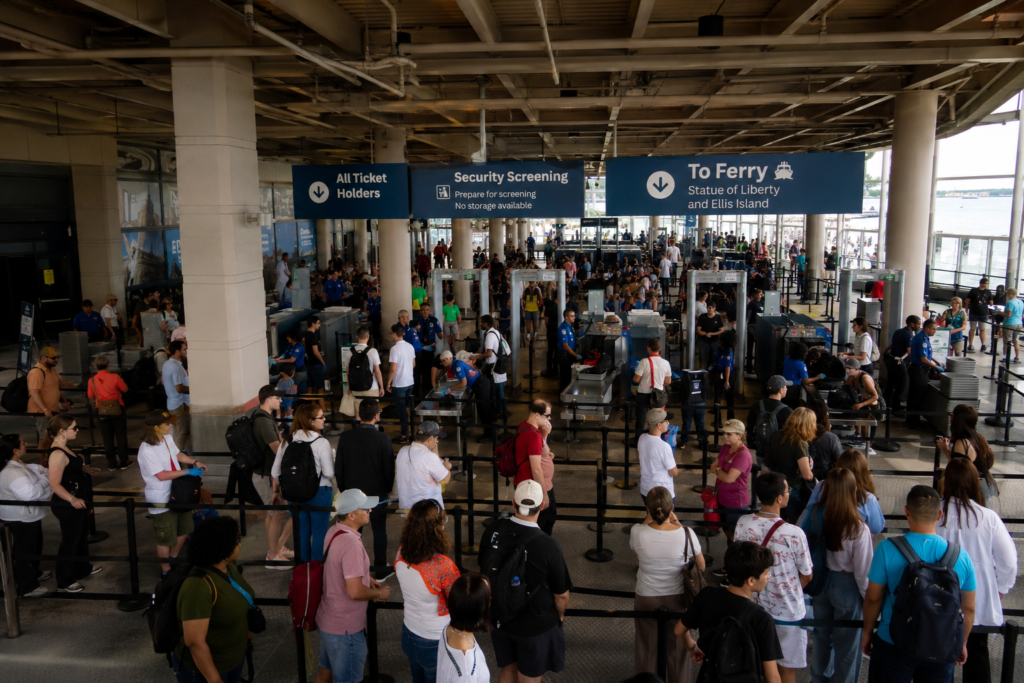
Step 2: Complete the Primary Security Screening
After joining the security line, you will pass through the main screening area before being allowed to board a ferry. Honestly, this is the stage that surprises many first-time visitors because it is more thorough than they expect.
From what I observed, one of the common Statue of Liberty entry mistakes is assuming the screening will take only a minute or two.
On busy days, allowing extra time here makes the visit much less stressful.
Airport-Style Screening Procedures Explained
The screening process is similar to what you experience at many transportation hubs. Bags are placed on a conveyor belt for inspection while visitors walk through security scanners.
I remember seeing staff members carefully guide travelers through each step. The process is straightforward, but everyone must complete it before entering the boarding area.
Items That May Delay or Prevent Entry
Large bags, restricted objects, or items requiring additional inspection can slow things down. Security staff may ask visitors to open bags if something needs a closer look.
Before arriving, it helps to review the official list of items not allowed at Statue of Liberty to avoid unnecessary delays at the checkpoint.
What Happens to Prohibited Items?
If an item is not permitted through security, visitors generally cannot take it onto the ferry. Security personnel will explain the available options at the screening area.
I have seen travelers caught off guard by this, especially when carrying things they assumed would be allowed. A quick check before leaving your hotel can save time and frustration later.
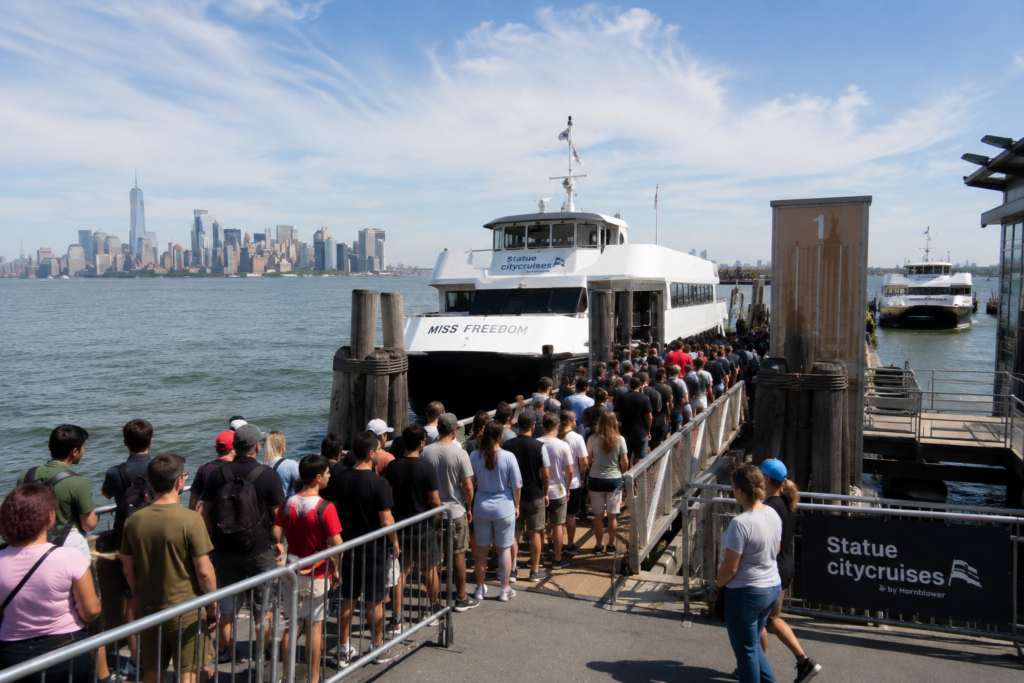
Step 3: Ferry Boarding Process
Once security is behind you, the atmosphere changes. People begin gathering near the boarding area, cameras come out, and the excitement starts to build.
From my experience, this part feels much more relaxed because the biggest checkpoint has already been completed.Even so, there are still a few small steps before stepping onto the ferry.
Paying attention to staff instructions makes the boarding process move smoothly and helps you avoid ending up in the wrong line.
Ticket Verification Before Boarding
Before entering the ferry, staff members verify tickets one more time. Keep your ticket accessible rather than packed away inside a bag.
I have watched visitors stop the line while searching through backpacks or pockets. Having everything ready makes the final check quick and easy.
Waiting Areas and Boarding Lines
After verification, visitors enter designated waiting areas until boarding begins. Depending on crowd levels, you may spend a short time standing in line near the dock.
The wait is usually a good chance to enjoy views of the harbor and watch ferries arriving and departing throughout the day.
Boarding the Next Available Ferry
When boarding starts, staff guide passengers onto the ferry in an orderly manner. There is no need to rush because everyone in the queue will be directed forward.
One thing I noticed is that many visitors immediately head for outdoor viewing areas.
If the weather is pleasant, the ride across the water becomes part of the experience itself before Liberty Island even comes into view.
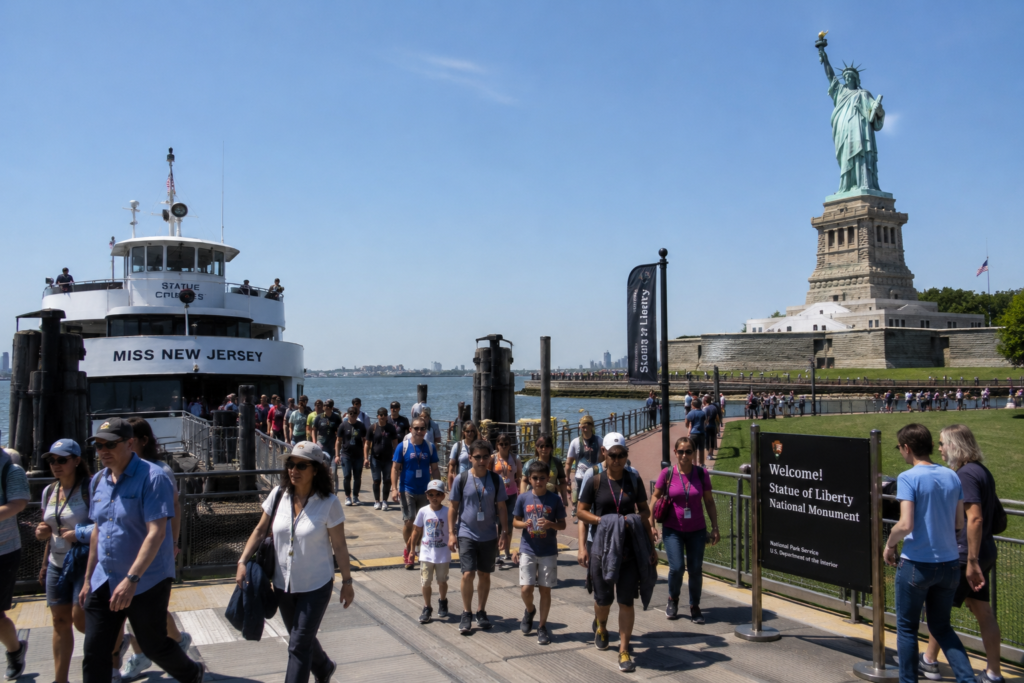
Step 4: Arrival and Entry on Liberty Island
The moment the ferry reaches Liberty Island, most people naturally move toward the exits to get their first close view of the statue.
Honestly, this is where the trip starts to feel real. After the ride across the harbor, seeing the monument standing directly ahead is a memorable sight.
Before heading off in any direction, take a moment to notice the pathways and information signs.
Understanding the Statue of Liberty entrance rules for visitors helps you move around the island smoothly and know where different attractions are located.
What Happens Immediately After Leaving the Ferry
Passengers leave the ferry through designated exit areas and enter the island grounds. Staff members are usually present to answer questions and guide visitors when needed.
I noticed that many first-time visitors stop for photos almost immediately. The views from the dock area are excellent, so it is easy to see why.
Following Signs to the Statue, Museum, and Grounds
Clear signs throughout the island direct visitors toward the Statue of Liberty Museum, monument entrance areas, walking paths, and visitor facilities.
Even on busy days, I found the signs easy to follow. A quick glance is usually enough to know which direction to take next.
Visitor Flow Around Liberty Island
Most visitors spread out naturally across the island after arriving. Some head straight toward the statue, while others begin with the museum or waterfront paths.
From what I observed, the crowds feel less concentrated once people move beyond the ferry dock. Walking at your own pace becomes much easier after those first few minutes on the island.
Step 5: Secondary Security Screening for Pedestal and Crown Visitors
Visitors with general grounds tickets do not need this step. However, if your ticket includes pedestal or crown access, you must complete another screening inside Liberty Island before entering the monument.
The second checkpoint is stricter because visitors are entering a historic structure. When I went through this area, staff carefully explained the rules and directed everyone toward the inspection point. The Statue of Liberty Crown and Pedestal Security Screening Guide becomes especially useful at this stage.
Who Must Pass Through Secondary Screening?
Only visitors holding valid pedestal or crown tickets are required to complete this additional security check. Those exploring the island grounds can continue without entering this queue.
I noticed some visitors mistakenly joining the line before realizing their ticket did not include monument access.
Items Allowed Inside the Monument
The monument has tighter restrictions than the ferry screening area. Visitors are generally limited to a small number of essential personal items while entering the pedestal or crown sections.
One question I heard often was, can you take food into Statue of Liberty monument areas. Food and large personal belongings are generally not permitted inside these restricted sections.
Locker Facilities and Storage Rules
Lockers are available near the monument entrance for visitors who need to store belongings before entering. This helps keep the interior areas safe and less crowded.
I found this helpful because many travelers arrive carrying more than what is allowed inside. Using a locker only takes a few minutes and makes the screening process much easier.
Conclusion
The Statue of Liberty entry journey is straightforward once you know what to expect. From arriving at the departure terminal and passing security to boarding the ferry and reaching Liberty Island, each step follows a clear path.
In my experience, visitors who arrive early and understand the screening requirements enjoy a much smoother visit. A little preparation saves time and helps you focus on the experience rather than the queues.
Whether you are visiting the grounds, pedestal, or crown, knowing the entry process in advance makes the day far more enjoyable. Arrive prepared, follow the instructions, and enjoy one of America’s most iconic landmarks.